Prevent Costly Repairs: Essential DIY Plumbing Maintenance Tips
Fixing Common Leaks
Addressing common leaks promptly can prevent larger problems such as water damage and spikes in utility bills. Two frequent issues are dripping faucets and leaky pipes, each requiring specific approaches for effective repair.
Addressing Dripping Faucets
Dripping faucets are a widespread nuisance that can significantly increase water bills. They usually stem from worn-out washers or seals in the faucet’s assembly. To fix a leaky faucet, turn off the water supply first. Carefully dismantling the faucet’s handle exposes the worn parts.
Replace any deteriorated washers, seals, or O-rings. Ensuring the assembly is put back in the correct order prevents further leaks.
After reassembly, turn the water back on and test the faucet by letting the water run. Observing if the dripping continues helps determine if the problem is resolved. If dripping persists, re-check the replaced components to ensure a snug fit. Making sure that parts are free from debris also prevents leaks.
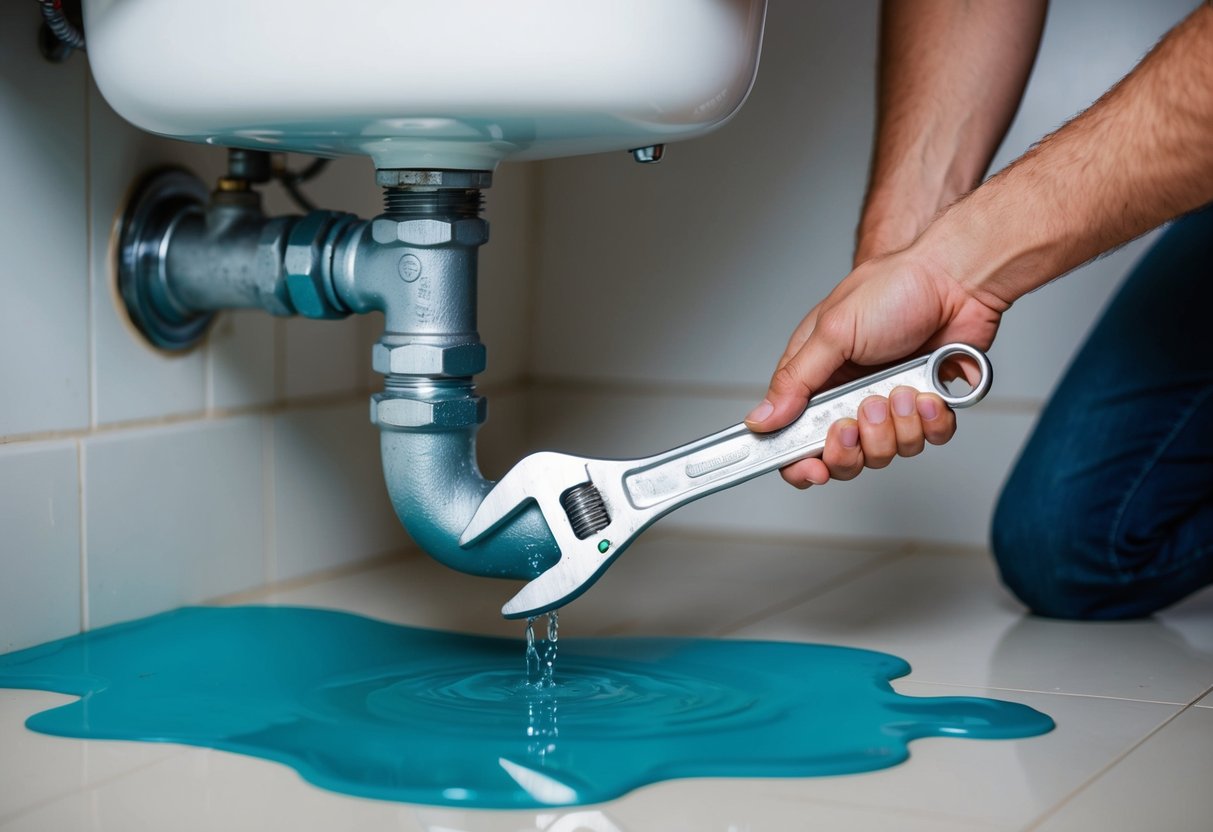
Repairing Leaky Pipes
Leaky pipes, left untreated, can lead to significant water damage. Identifying the location of the leak is the initial step. Turning off the water supply to the affected area helps manage the situation while exploring repair options.
For minor leaks, pipe joint compound or pipe tape creates a suitable seal. Larger leaks sometimes require temporary measures like using a pipe clamp or wrap. These methods provide interim fixes but should be addressed with permanent solutions as soon as possible.
Replacing the damaged section of the pipe might offer a long-term repair. After repairing, restoring water flow to check for any persistent leakage confirms the fix’s success. Regularly checking pipes ensures early detection of potential problems, minimizing damage risks.
Water Heater Upkeep
Regular water heater maintenance can prevent malfunctions and extend its lifespan. Addressing sediment buildup through routine draining and inspections for rust are critical tasks.
Draining and Flushing the Tank
Draining and flushing the tank is a vital step in maintaining a water heater. Sediment naturally builds up at the bottom of the tank over time, affecting efficiency and potentially leading to malfunctions. It’s recommended to perform this task annually. To begin, turn off the power or gas supply and allow the water to cool. Attach a hose to the drain valve, directing the water to a safe drainage area.
Open the valve to let the water and sediment flow out. Once empty, briefly open the cold-water supply to flush out any remaining particles. Properly closing the valves in the correct sequence is essential to prevent leaks. This process not only enhances energy efficiency but also prolongs the water heater’s operational life.
Checking for Rust or Damage
Inspecting the heater for rust or damage is key to preventing costly repairs. Rust often appears around joints and connections, indicating corrosion which could lead to leaks. While examining, look for any signs of moisture or small water pools around the unit. Such indications may signal failing components or seals.
It’s essential to inspect the anode rod, a metal component that prevents rust inside the tank. Replace it every few years if it appears significantly corroded. Observing any discoloration in the water that may imply rust contamination is also important. Performing these checks periodically ensures the heater operates efficiently and minimizes unexpected breakdowns.